Best Exercises to Help Relieve Joint Pain
Exercise is essential for persons who have arthritis. It improves strength and flexibility, alleviates joint pain, and lowers fatigue. Of course, when your joints are already stiff and aching, the prospect of going around the block or swimming a few laps may seem daunting.
Exercise keeps you moving when arthritis tries to paralyze you. However, you don’t have to run a marathon or swim as quickly as an Olympic swimmer to help relieve arthritis symptoms. Even light exercise can help you manage discomfort and maintain a healthy weight. Still not convinced? Continue reading.
Why is exercise vital?
Best joint pain exercises can help you improve your health and fitness while not causing joint pain. Exercise can help you with your current treatment plan by:
- Work on strengthening the muscles around your joints.
- It helps you retain bone strength
- It gives you more energy to go through the day
- It makes it simpler to obtain a decent night’s sleep
- Aids in weight control
- Improve your quality of life
- Work on your balance.
Contrary to popular belief, exercise will not increase your joint pain and stiffness. A lack of activity can aggravate joint pain and stiffness. Maintaining the strength of your muscles and surrounding tissue is critical to preserving bone support. Lack of joint pain exercise weakens those supporting muscles, putting additional strain on your joints.
Consult your doctor beforehand
Consult your doctor about including exercise in your treatment plan. The ideal workouts for you will depend on your type of arthritis and the joints involved. Your doctor or physical therapist can help you select the workout regimen that will provide you with the most benefit while causing the least amount of irritation to your joint discomfort.
Arthritis exercises
Your doctor or physical therapist can advise you on range-of-motion exercises, strengthening exercises, aerobic exercises, and other activities.
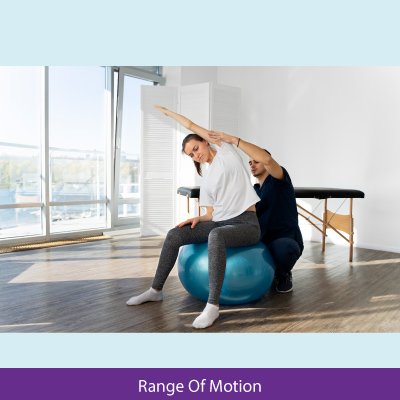
Exercising range of motion
These exercises help to reduce stiffness and improve your ability to move your joints over their whole range of motion. These movements could include raising your arms above your head or rotating your shoulders forward and backward. These exercises can usually be done daily.
Exercising for Strength
These workouts assist you in developing strong muscles that support and protect your joints. Weight training is an example of a strengthening activity that can help you keep or gain muscle strength. Remember to avoid working out the same muscle groups on consecutive days. Rest a day in between workouts and take an additional day or two if your joints are uncomfortable or swollen.
A three-day-a-week program will help you jump-start your improvement when starting a strength-training program, but two days a week is all you need to maintain your gains.

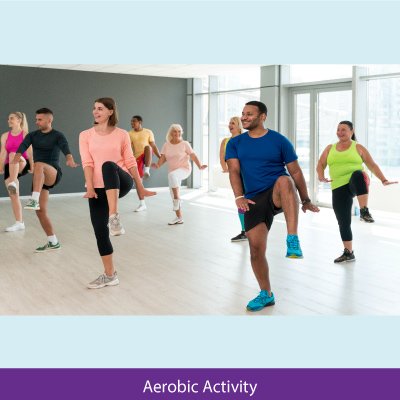
Aerobic activity
Aerobic and endurance workouts improve general fitness. They can help you lose weight, enhance cardiovascular health, and offer you more stamina and vitality.
Walking, bicycling, swimming, and utilizing an elliptical machine are low-impact aerobic exercises that are gentler on your joints. Try to increase your weekly aerobic activity to 150 minutes of moderate intensity. If it’s easier on your joints, divide the duration into 10-minute increments.
Moderate-intensity aerobic exercise is the safest and most effective if done most days of the week, but even a couple of days per week is preferable to no activity. You should be able to carry on a conversation while exercising to determine if you are in the moderate-intensity exercise zone, even if your respiratory rate will be increased.
Other pursuits
Any movement, no matter how tiny, can be beneficial. Mowing the lawn, raking leaves, and walking the dog are all examples of daily tasks.
For example, gentle yoga or tai chi can help you improve your balance, prevent falls, enhance your posture and coordination, and encourage relaxation. Tell your instructor about your condition and avoid positions or movements that are uncomfortable for you.

Tips for Joint Protection
If you haven’t been active in a while, start carefully to ease your joints back into it. Pushing yourself too hard might overwork your muscles and aggravate joint pain.
Consider the following suggestions as you begin:
- Maintain a low impact
- Turn on the heat
- Move slowly
- Slow down
- Following that, ice
Trust your senses and avoid exerting more energy than your joints can tolerate. Take it easy at first, gradually increasing the time and intensity of your workouts as you progress.
Don’t overdo it
You may feel pain after exercising if you haven’t been active in a while. If you’re hurting for more than two hours after exercising, you probably overdid it. Discuss with your doctor what pain is typical and what pain indicates something more serious.
Ask your doctor if you should exercise during general or local flares if you have rheumatoid arthritis. One alternative is to work through joint fits by performing solely range-of-motion exercises or exercising in water to cushion your joints.
Exercise routines for arthritis patients
Check with your doctor about arthritis exercise programs in your region. Special programs are available at several hospitals, clinics, and health clubs.
In many locations in the United States, the Arthritis Foundation offers arthritis exercise programs. Programs include water and land workout sessions, as well as strolling groups. For further information, don’t hesitate to get in touch with your local branch.
In the end,
Exercise should push you, but it should not hurt. It is typical to have some muscle discomfort when beginning a new exercise regimen. However, if it lasts more than a couple of days, reduce your workout to give your body more time to adjust to the new schedule. Consult your doctor if you are experiencing persistent pain.
If you are looking for best-in-class treatment for your health issues, do contact Dr. Niraj Patel. He’s one of the most reputed doctors of Om physio!