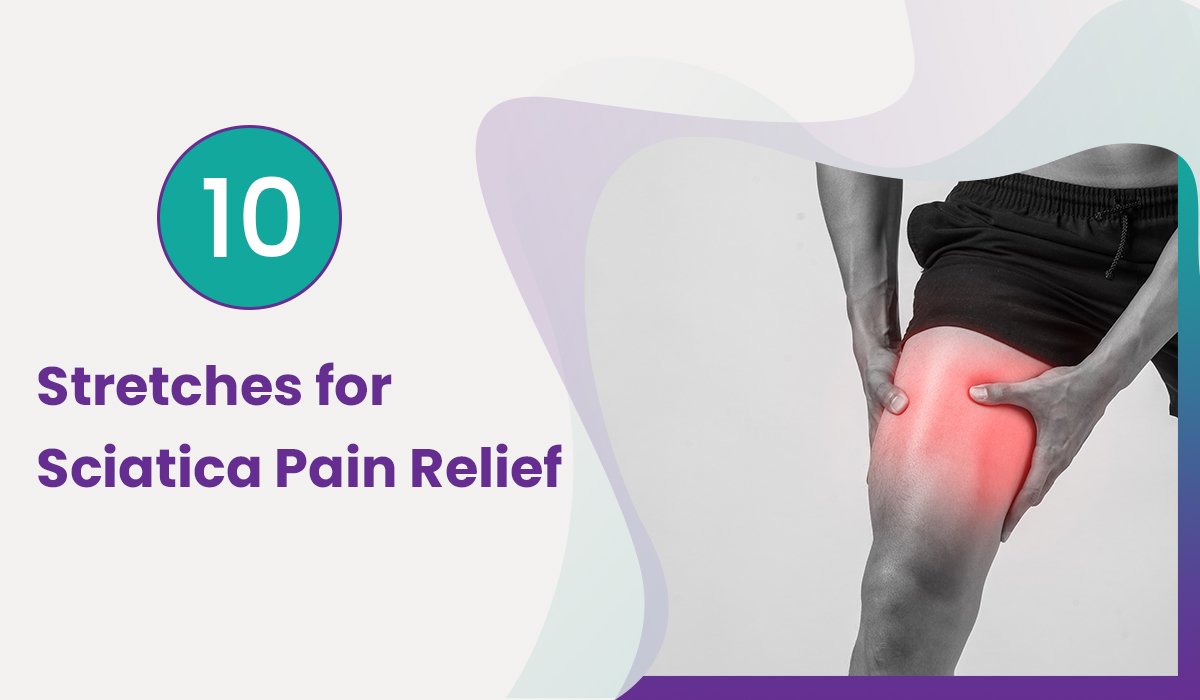
What is Tailbone Pain? Causes and Exercises to Provide Comfort?
The sharp, persistent ache emanating from the base of the spine can hamper even the simplest of movements. This article delves into the intricacies of tailbone pain, elucidating its causes and unveiling the common symptoms that plague its unfortunate victims. From tailbone injuries to childbirth, poor posture, and the enigmatic condition known as coccydynia, we embark on a somber exploration of this affliction. Furthermore, we explore the role of tailbone pain relief exercises and the expertise of physiotherapists in Ahmedabad in mitigating this torment.
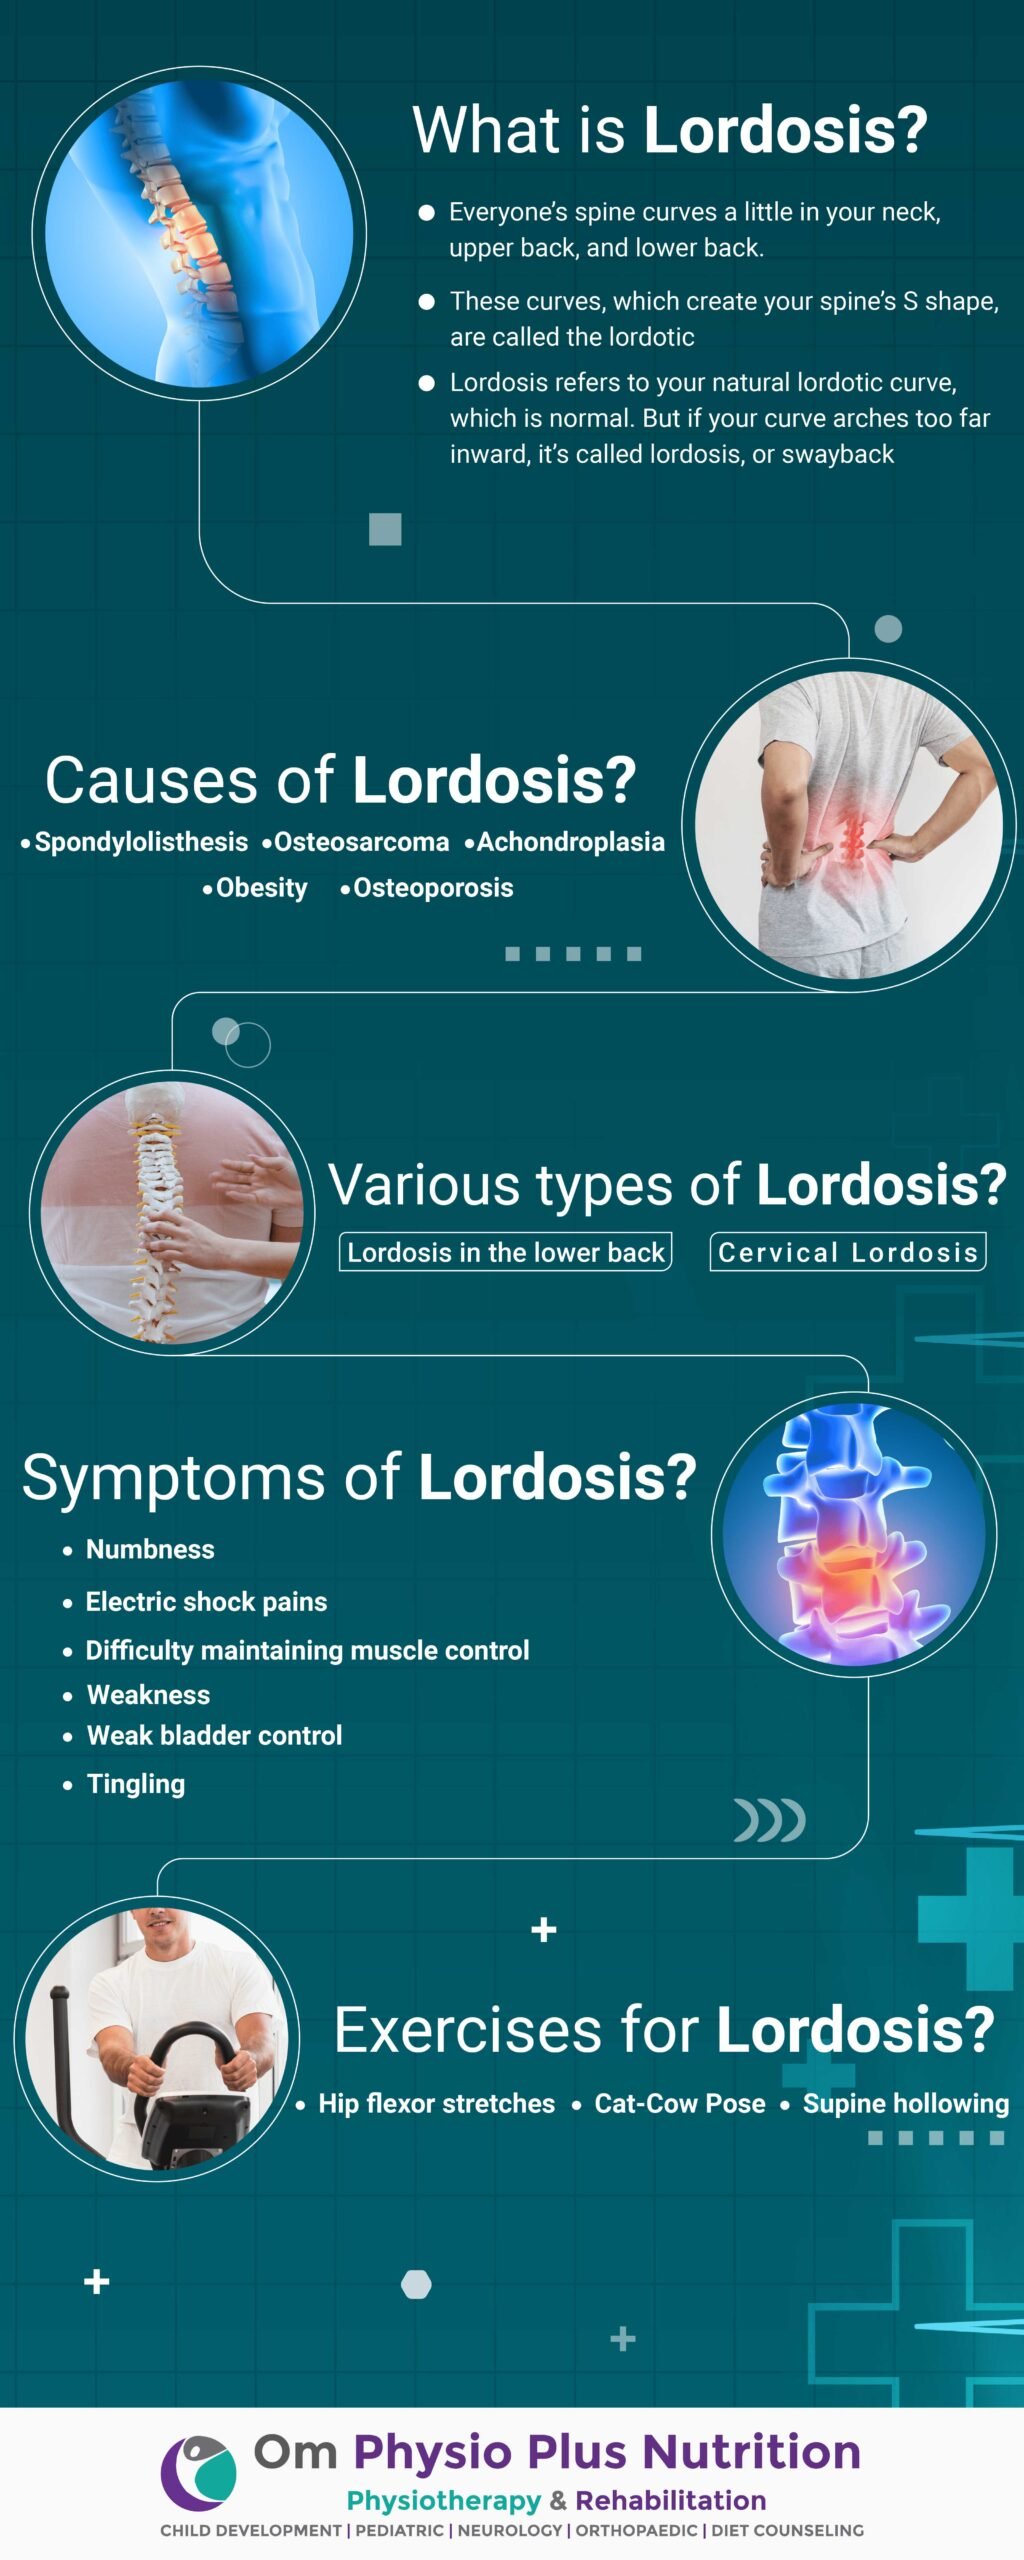
What is Tailbone Pain?
Tailbone pain, also known as coccydynia, refers to the discomfort or pain experienced in the coccyx, which is the small, triangular bone at the bottom of the spine. The coccyx, commonly referred to as the tailbone, consists of three to five fused vertebrae. Tailbone pain can range from mild to severe and can be acute (short-term) or chronic (long-lasting).
What are the most common causes of tailbone pain?
- Tailbone Injuries: One common cause of tailbone pain is direct trauma or injury to the coccyx. Accidents, falls, or impact during sports activities can result in fractures, dislocations, or bruising of the tailbone. The ensuing pain can be excruciating and prolonged, necessitating specialized treatment and care.
- Childbirth: The miracle of childbirth, although wondrous, can leave enduring effects on a woman’s body. During delivery, the pressure exerted on the tailbone as the baby passes through the birth canal can cause considerable trauma. This trauma can lead to tailbone pain, which may persist long after the birth. Tailbone pain relief exercises and targeted physiotherapy can offer respite to mothers burdened by this postpartum discomfort.
- Poor Posture: In an era where sedentary lifestyles prevail, poor posture has become a pervasive problem. Slouching, sitting for extended periods, or assuming incorrect body alignment can strain the tailbone and surrounding muscles. Over time, this strain can contribute to tailbone pain, necessitating a concerted effort to correct posture and engage in therapeutic exercises.
- Coccydynia: A mysterious and elusive condition, coccydynia refers to chronic tailbone pain with no apparent cause. It can arise spontaneously or follow a previous tailbone injury. The exact mechanisms behind coccydynia are not fully understood, but it is believed to involve inflammation, nerve sensitivity, or muscle dysfunction. Tailbone pain relief exercises tailored to individual needs, combined with the expertise of a skilled physiotherapist in Ahmedabad, can be instrumental in managing coccydynia.
Some Effective stretching exercises for tailbone injuries
In this section, we delve into several stretching exercises that can provide respite from tailbone pain. Remember, consulting a physiotherapist in Ahmedabad, if you are looking for treatment there, before engaging in these exercises is prudent, as they can tailor a program to suit your individual needs.
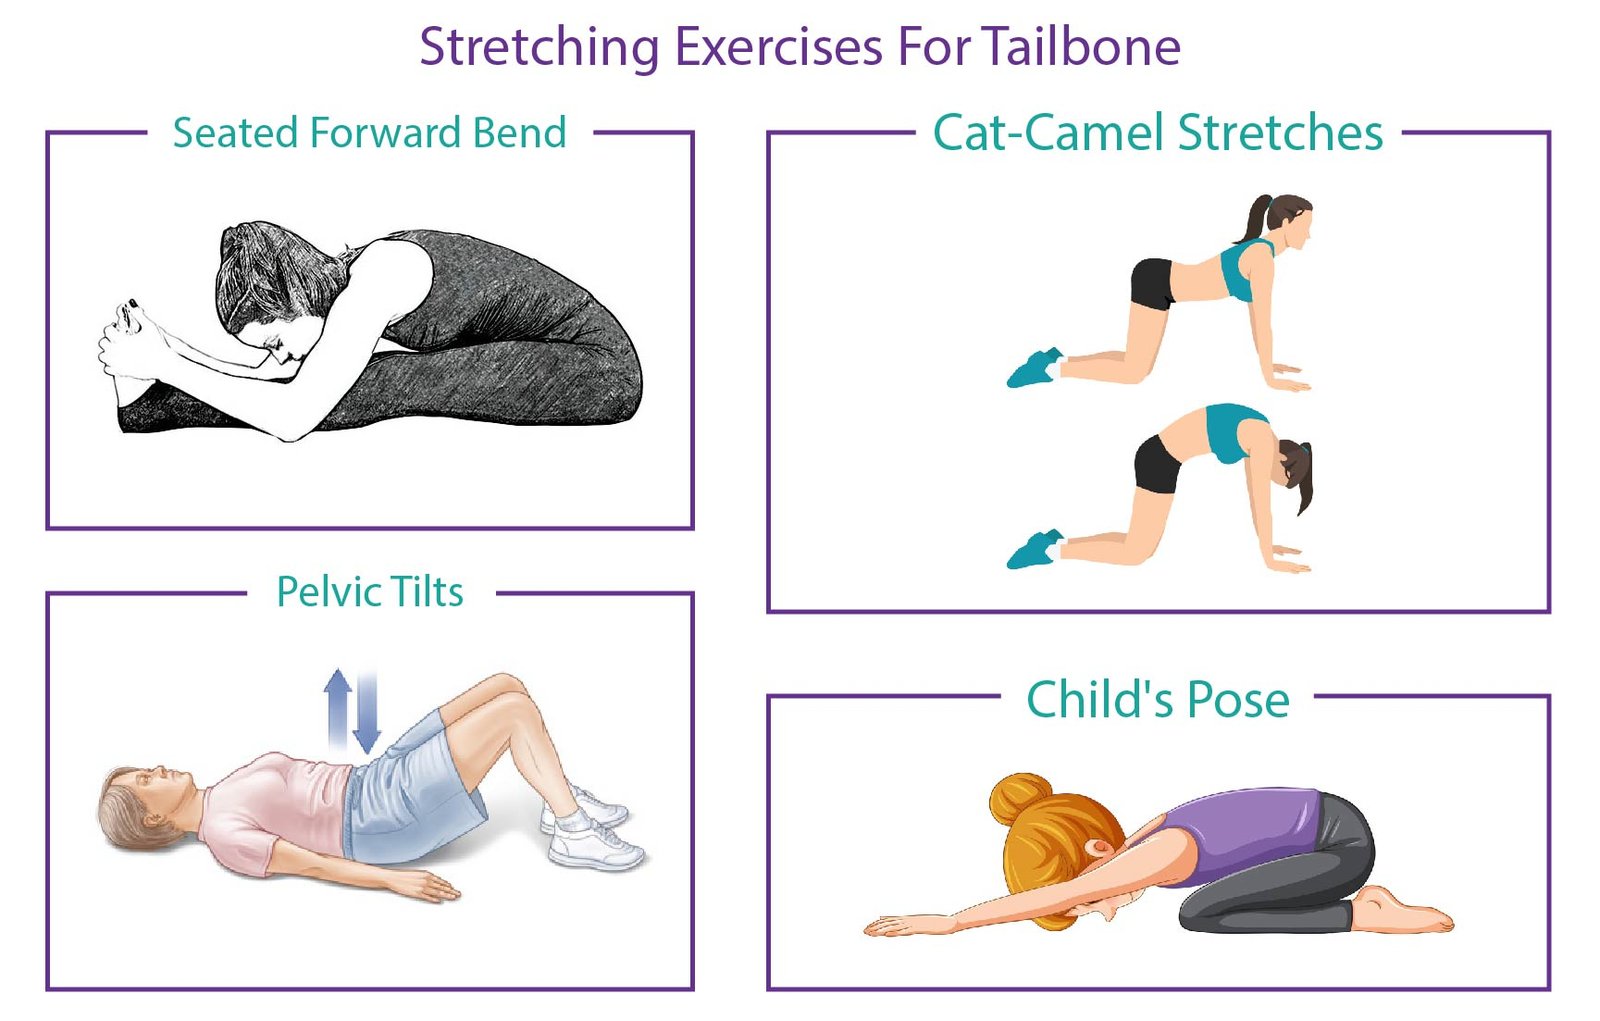
Seated Forward Bend:
- Step 1: Begin by sitting on the edge of a chair or a firm surface with your feet flat on the floor.
- Step 2: Inhale deeply, lengthening your spine, and exhale as you slowly bend forward from your hips, maintaining a straight back.
- Step 3: Extend your arms forward, reaching towards your feet or the floor, and allow your head to relax.
- Step 4: Hold the stretch for 20-30 seconds, feeling the gentle elongation in your lower back and tailbone.
- Step 5: Slowly return to the starting position and repeat the stretch 2-3 times.
Pelvic Tilts:
- Step 1: Lay your back with knees bent and flat feet, hip-width apart.
- Step 2: Inhale deeply, and as you exhale, engage your abdominal muscles and tilt your pelvis upward, pressing your lower back into the floor.
- Step 3: Hold the position for a few seconds, feeling a gentle stretch in your tailbone area.
- Step 4: Inhale as you release the tilt, allowing your lower back to return to a neutral position.
- Step 5: Repeat the movement 10-15 times, focusing on controlled and fluid motions.
Cat-Camel Stretches:
- Step 1: Position yourself on your hands and knees, with your hands directly beneath your shoulders and knees aligned with your hips.
- Step 2: Inhale deeply and arch your back upward, tucking your tailbone and allowing your head to drop gently.
- Step 3: Hold this position for a few seconds, feeling a stretch along your spine and tailbone.
- Step 4: Exhale as you reverse the movement, dropping your belly towards the floor, lifting your head, and allowing your tailbone to point upward.
- Step 5: Repeat the cat-camel stretch 8-10 times, focusing on the fluidity of the movement and the release of tension in the tailbone area.
Child’s Pose:
- Step 1: Begin on all fours, with your knees wide apart and your big toes touching.
- Step 2: Slowly sit back on your heels, extending your arms forward and lowering your chest towards the floor.
- Step 3: Allow your forehead to rest on the floor or a cushion, feeling a gentle stretch in your lower back and tailbone.
- Step 4: Breathe deeply and hold the pose for 30-60 seconds, allowing your body to relax and release tension.
- Step 5: Slowly come out of the pose by lifting your upper body and returning to an upright position.
What are the strengthening exercises for tailbone pain?
In the pursuit of tailbone pain relief, strengthening exercises that target the muscles surrounding the coccyx can provide vital support and stability. By engaging in specific exercises, you can build strength, enhance endurance, and foster resilience in the tailbone area. In this section, we explore exercises that aim to fortify these muscles, offering respite from tailbone pain. Remember, it is advisable to consult with a physiotherapist in Ahmedabad to ensure the exercises are appropriate for your condition and to receive personalized guidance.
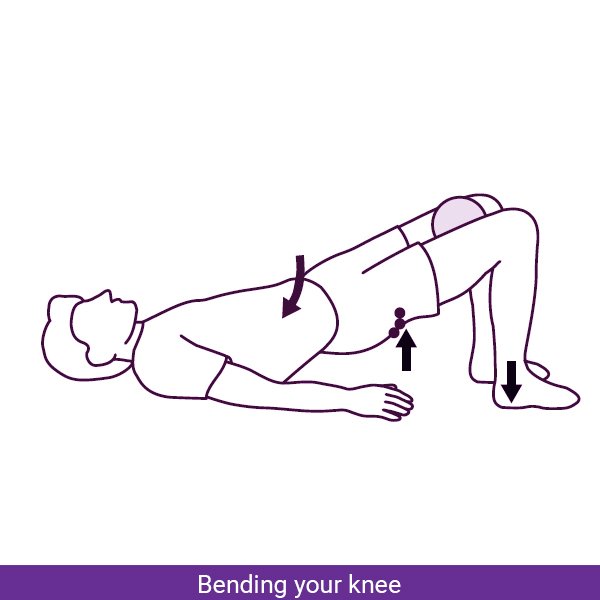
Bridges:
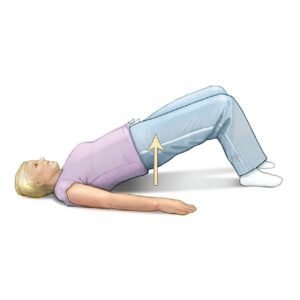
- Step 1: Begin by lying on your back with your knees bent and feet flat on the floor, hip-width apart.
- Step 2: Place your arms by your sides, palms facing down, to provide stability during the exercise.
- Step 3: Take a deep inhale, and as you exhale, activate your gluteal muscles.
- Step 4: Hold the bridge position for a few seconds, squeezing your glutes and feeling the contraction in the muscles surrounding the tailbone.
- Step 5: Inhale as you slowly lower your hips back to the starting position. Step 6: Repeat the exercise for 10-12 repetitions, focusing on controlled movements and maintaining proper form.
Squats:

- Step 1: Stand with your feet shoulder-width apart and toes pointing slightly outward.
- Step 2: Extend your arms forward for balance or place your hands on your hips.
- Step 3: Inhale deeply, and as you exhale, initiate the movement by bending your knees and pushing your hips back as if sitting into a chair.
- Step 4: Lower yourself until your thighs are parallel to the floor or as far as you can comfortably go.
- Step 5: Inhale as you push through your heels and extend your legs, returning to the starting position.
- Step 6: Repeat the squat for 10-15 repetitions, focusing on maintaining proper alignment and engaging the muscles around the tailbone throughout the movement.
Bird Dogs:

- Step 1: Begin on all fours, with your hands directly beneath your shoulders and knees aligned with your hips.
- Step 2: Inhale deeply, and as you exhale, engage your core muscles.
- Step 3: Extend your right arm forward while simultaneously extending your left leg backward, maintaining a straight line from your fingertips to your toes.
- Step 4: Hold the position for a few seconds, feeling the activation in the muscles surrounding the tailbone. Step 5: Inhale as you lower your arm and leg back to the starting position.
- Step 6: Repeat the exercise on the opposite side, extending the left arm and right leg.
- Step 7: Perform 8-10 repetitions on each side, focusing on stability, control, and proper alignment.
Techniques other than exercises that can help manage tailbone pain
While tailbone pain relief exercises play a pivotal role in alleviating the torment, there are other techniques that can complement your journey towards serenity. These additional strategies encompass a range of practices aimed at managing and mitigating tailbone pain.
- Application of Heat and Cold: Applying heat or cold therapy to the affected area can provide temporary relief from tailbone pain. For acute pain or inflammation, use an ice pack wrapped in a thin cloth and apply it to the tailbone for 15-20 minutes, several times a day. For chronic pain or muscle tension, a heating pad or warm compress can help relax the muscles and alleviate discomfort. Remember to follow the instructions provided and avoid direct contact with the skin to prevent burns or frostbite.
- Over-the-Counter Pain Relievers: Over-the-counter pain relievers such as acetaminophen or nonsteroidal anti-inflammatory drugs (NSAIDs) can provide temporary relief from tailbone pain. However, it is important to consult with a healthcare professional or pharmacist to ensure their safe and appropriate use, considering any pre-existing medical conditions or potential interactions with other medications.
- Cushions or Donut-Shaped Pillows: Using cushions or donut-shaped pillows while sitting can help relieve pressure on the tailbone, especially if prolonged sitting exacerbates your pain. These specially designed cushions provide a cut-out or indentation in the center, reducing direct contact and alleviating discomfort. Experiment with different types of cushions to find the one that best suits your needs and provides optimal support.
- Relaxation Techniques: Practicing relaxation techniques such as deep breathing, meditation, or mindfulness can help manage tailbone pain by promoting overall relaxation and reducing stress. Engage in deep, slow breaths, focusing on releasing tension with each exhale. Explore guided meditation or mindfulness apps to enhance your relaxation practice and foster a sense of tranquility amidst the pain.
- Professional Guidance and Physical Therapy: Seeking the expertise of a physiotherapist in Ahmedabad is vital for comprehensive management of tailbone pain. A skilled physiotherapist can assess your condition, develop an individualized treatment plan, and guide you through tailored tailbone pain relief exercises and techniques. They may incorporate manual therapy, electrotherapy, or other specialized modalities to optimize your recovery and pain management journey.
Conclusion
Through tailbone pain relief exercises, the guidance of a skilled physiotherapist in Ahmedabad, and the adoption of additional techniques, relief is within reach. With the expertise of Dr. Niraj Patel, you can navigate the path towards liberation from tailbone pain.


 Squats: Squats are a powerful exercise for strengthening the legs and core muscles. They also help to boost metabolism and burn fat all over the body, including the belly.